Posted in Tips & Tricks
(I get so many questions about bias tape… how do I make it, how do I get such a smooth finish
etc. etc., so I thought it was high time I did a series devoted to bias-taping and here’s the 2nd in a little three-post mini-series.)
So…
in our last post in this little mini-series we gave you EIGHT good reasons to make your own bias tape but it now occurs to me that we may have left out the best reason(s) of all…
It’s EASY! (and oh yeah, it’s fun too!)
And having already anticipated the skepticism out there (yep, I see those eyes rolling from here!), I’ve prepared this little tutorial for you. I don’t expect this post will make me real popular with the good folks at Wright’s but that was never my objective anyway. So here goes!

I’ve gotten so I only rarely choose a solid color for bias tape. Of course there’s nothing wrong with doing so, but I generally go with a complimentary print or a black & white stripe, polkadot or print, which I think of as the “perfect neutral”!
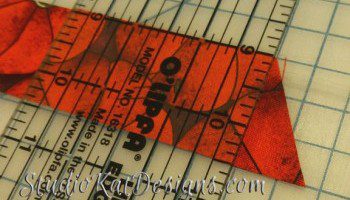
Next, choose your bias ‘angle’. In the picture at below I’ve demonstrated the classic 45 degree cutting angle, but you know what? This angle tends to “eat up” more fabric than a steeper degree of angle would and I have honestly had success using bias tape at virtually any angle. The important thing is to cut across both sets of threads (both lengthwise and crosswise) to sufficiently “damage” the fabric, thus allowing it to s-t-r-e-t-c-h.

How wide should your strips be? That all depends on your project. Pre-packaged bias tape is typically ~7/8″ wide, which is for the most part inadequate for binding bag edges. We always recommend extra-wide bias tape (for those who insist on purchasing it) but it’s usually 1-7/8″ wide which is almost always too wide. (and yes, that can be just as big a problem as too narrow!)
We generally prefer strips that are 1-1/2″ wide, although our recommendation is sometimes design specific.
You want to get rid of the angle on BOTH ends of each strip in favor of a straight 90 degree corner.
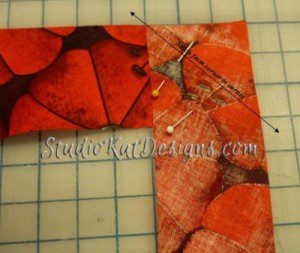
Assuming that more than one strip of bias tape will be needed, match your corner edges right sides together and secure this placement with pins.
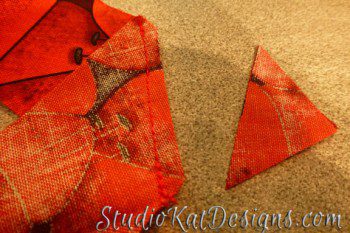
Trim the seam to ~1/4″ removing the diagonal corners, then press seams open and flat.
When I display our sample bags at shows, I receive innumerable compliments about our bias tape and how smooth it looks. Most folks insist they could never accomplish a smooth finish like this, but here’s the deal. Achieving a good-looking bias tape finish is no mystery, nor is it just reserved for professionals. The only thing you need do is quit following the manufacturers instructions for applying it!
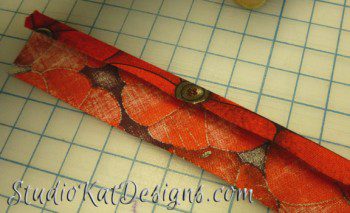
First of all, I absolutely do NOT recommend pressing BOTH long edges over to the center, which is the way you see most commercial bias tape presented in packages, and also the way most folks have learned to apply bias tape. I suppose it might work OK for items with ALL straight-edges like quilts, but for small projects with curved edges (like handbags), it’s absolutely a recipe for ripples and lumps! Why is that? Actually, I feel so strongly about this that I’ll devote my NEXT post in this series to that question, but for now, I recommend just pressing only ONE edge over ~3/8-1/2″ wrong sides together. Now I know most people only press over ~1/4″ , but this extra allowance gives me some wiggle room, because let’s face it, all unbound edges are not created with equal thickness. By my way of thinking, I would MUCH rather have to roll out a bit of this extra allowance in order to cover the stitching and raw edges evenly, especially in the event that I encounter a bulky seam junction (which I probably will somewhere along the way).
And now…
Your bias tape is ready to apply to your project! So stay tuned for the next post in this series when I’ll show you the a foolproof, sure fire way to get a ripple-free finish on your bias-taped edges!
So…. Which type of bias tape do YOU use? Do you generally make your own, or do you purchase it commercially? I would love for you to share your preference as well as the reasoning behind your choice!
***********************************************************************
Check out the best sewing pins with me on Pinterest, join in on discussions or show off your work in our FaceBook Group, or get your daily sewing fix on our Facebook Business Page or get behind the scenes scoops on Instagram, and be the 1st to know about new patterns, discount codes and sample sales by signing up for our monthly newsletter.
Join Our Mailing List!
Click button below to get 15% off your 1st pattern!


