So…
even though I spent a LOT of time piecing together the sample I showed you in our last post, that amount of time was nothing compared to how long I spent piecing THIS sample together.
Now don’t get me wrong, I LOVE a good piecing challenge, but this one took the cake! But here’s the deal… from the moment I saw this fabric I had a vision for how I wanted to use it, but what I didn’t count on was how very little of this yardage was print-free… or shall I say bubble-free! As a matter of fact I tried very hard to find a coordinating solid fabric so I wouldn’t have to labor so hard, but this background is such a weird color. Is it mauve? is it grey? Is it brown?
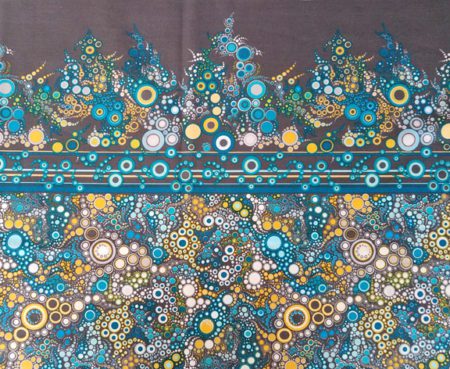
Who knows, but whatever the answer it’s near impossible to match it to ANY solid. At any rate, the only solid area I had to work with for this bag was that which you see at the very top in this picture at left. I pieced it together in a totally random and assymetrical way, so if you ever see this particular sample at one of our shows, check it out to see what I mean! From the distance it looks fine, but up close it looks a little hap-hazard.
Bottom line— I wasn’t about to let this fabric beat me! But while were talking about this fabric, here’s some details you might need should be interested in
duplicating this look, (which I do NOT recommend) It’s called “Effervescence Single Border in Reviera” from the Effervescence collection by Amelia Caruso for Robert Kauffman Fabrics and I have no plans for carrying since I don’t know I’d EVER explain how it is that I pieced it together. 😀
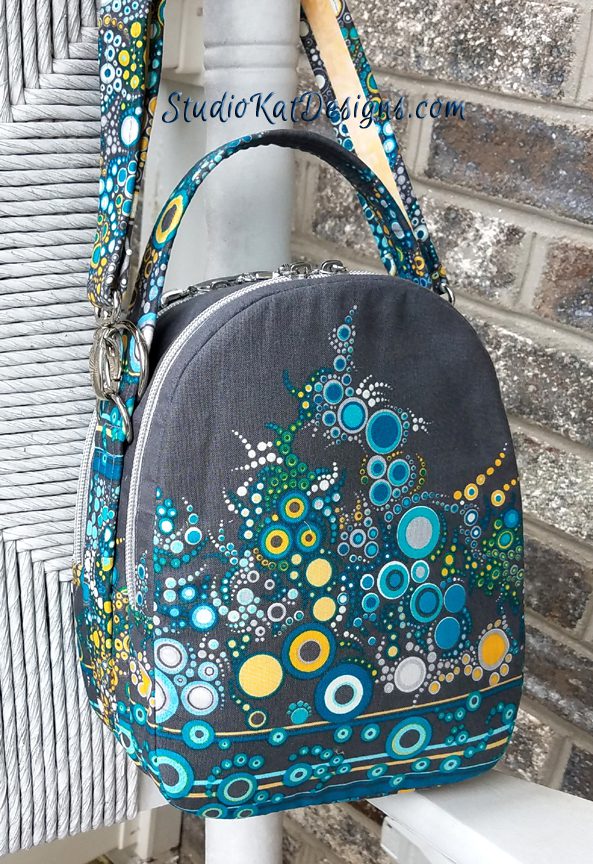
But with the fabric details out of the way, here’s some more pictures of this sample. As you can see, I used our brand new All-Silver zips with the “star” pulls.
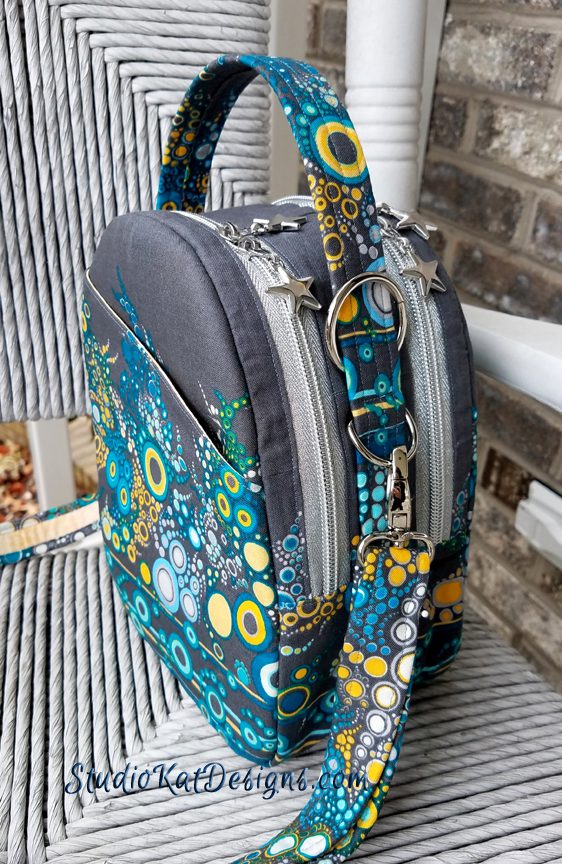
This picture (above) gives you a better look at the zips and the pulls and I think they work perfectly with the aforementioned oddly colored background. It also gives you a good look at the back slash-pocket. I like storing my phone in this pocket and just so you know, I’ve been carrying an early sample of this bag for over 2 months now and at no time has my phone fallen out, even though I am notorious for dumping my bag off the counter or car seat!
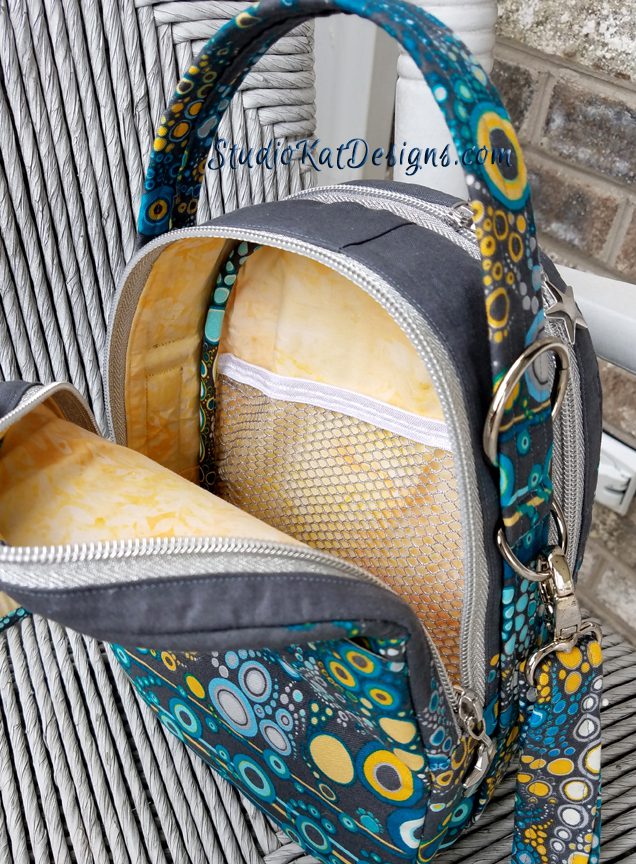
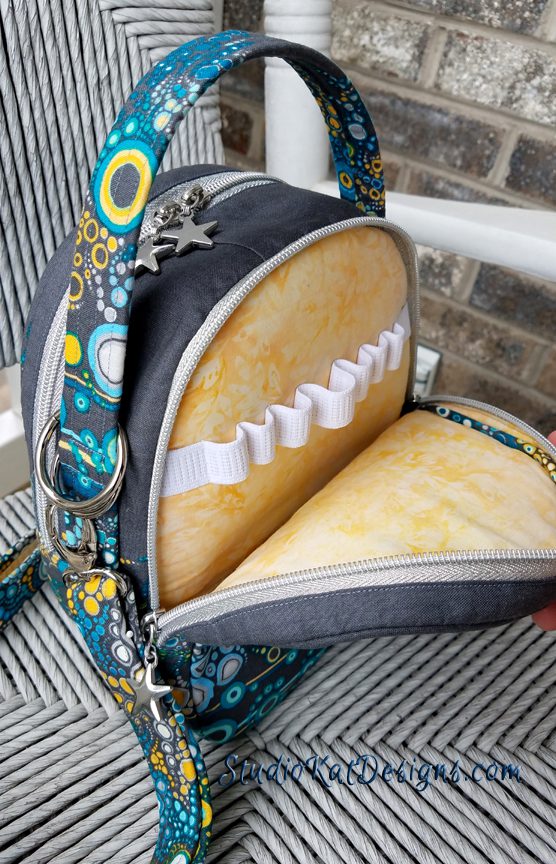
This is a good shot of the back storage compartment for this bag which is considerably larger than the front area. I’ve included several elastic loops for pens, pencils and other similarly shaped objects.
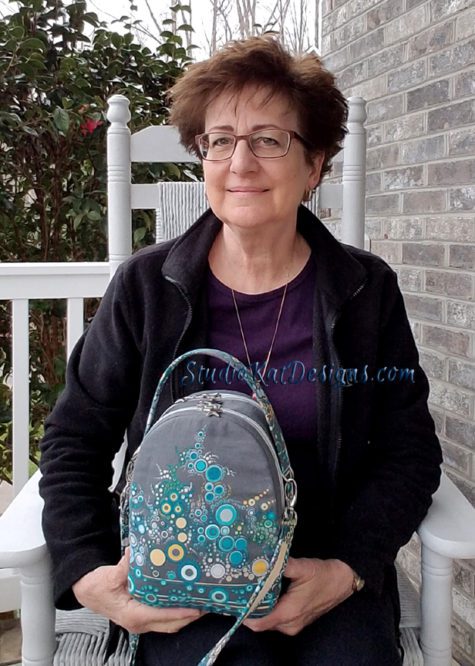
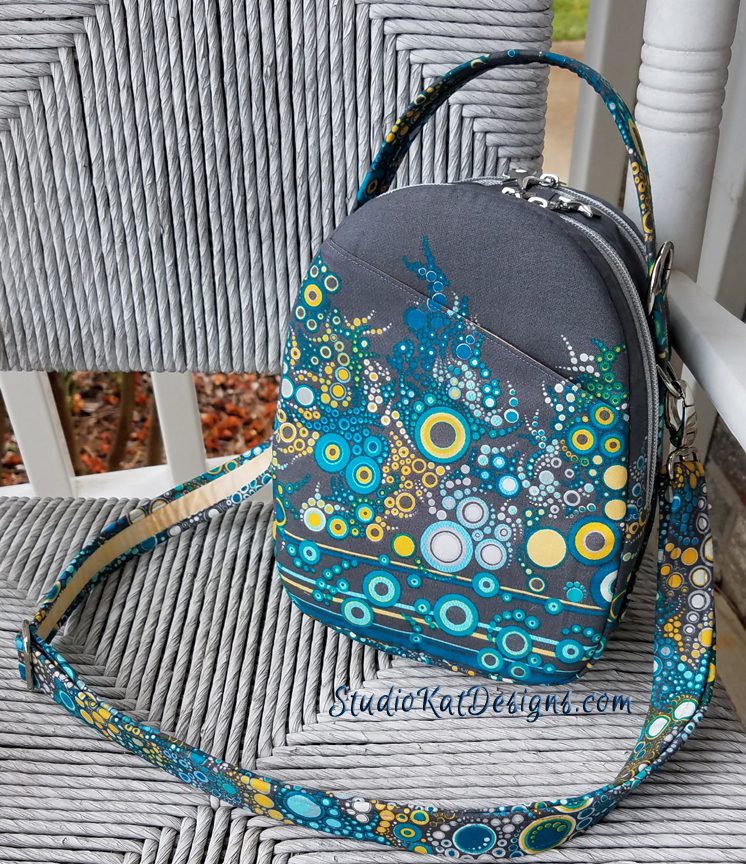
And finally, I’ve included this picture (even though its not a particularly good one of me) in order to give you a decent idea of size proportion.
I did not make an additional strap for this sample, even though I did add the required O-ring in order to convert it to a backpack. I may yet go back and make this strap but I haven’t decided for sure yet. If you’re interested in seeing how this bag can be carried as a backpack, just click HERE and scroll to the bottom of the post!
And NOW…
I’m pleased to announce that thanks to my very dear friend Mary, we’ve at last settled on a name for this design! It will be heretofore be known as…
The Bangle Buddie
Other pertinent info –
Size= 7″ wide X 9″ tall X 4″
Anticipated release date= mid-late May 2019
And now…. it’s YOUR turn!
- if any of you are fussy-cutting fanatics like me, and
- what you think of the name we’ve chosen.
And remember, we love reading your comments and answering your questions too, so please feel free to leave either or both in the space provided below.
******************************************************************************************
Join us in our FaceBook Group! It’s just for StudioKat Designs customers and its the perfect place for you to post pictures, comments or questions about our patterns! How cool is that, right? And don’t forget to check out the best sewing pins with me on Pinterest, get your daily sewing fix and behind the scenes scoops on Instagram, and be the 1st to know about new patterns, discount codes and sample sales by signing up for “Kat Bytes”, our monthly newsletter.
Join Our Mailing List!
Click button below to get 15% off your 1st pattern!


