So…
after a discussion about interfacing a few of weeks ago, alert reader Barb Fairlane sent me a in a description of how she manages to keep her pattern pieces looking marvelous even after MANY uses & when I heard it all i could do was smack my forehead and say DUH! Now maybe there’s bunches of you who already do this, but just in case this is a new idea to a few of you out there, let me show you what Barb suggested to me!
That’s right!
Barb recommended interfacing your pattern pieces!

The easiest way to do this is to lay the brand new pattern sheet wrong-side DOWN on the fusible side of the interfacing, but that’s not always possible is it? (In my case, it’s almost impossible since my pattern pieces are in the process of being developed!)
I recently did this with the pattern pieces for a design I’ve been fiddling around with for a while and obviously they were NOT pre-organized into a pattern sheet, so here’s how I did it at left.
Once again, lay the pieces wrong-side DOWN on the fusible side of interfacing, BUT… you have to be more careful how you fuse your pieces in place in this scenario because there’s likely to be some fusible areas of your interfacing left uncovered and you sure don’t want to gum up the surface of your iron, right?
So… in this case I give each piece a quick hit with my iron (keeping my iron away from the edges of each template), with the objective being to keep them in place long enough to flip the whole area fusible-side DOWN on a towel (so you don’t gum up your regular pressing area).

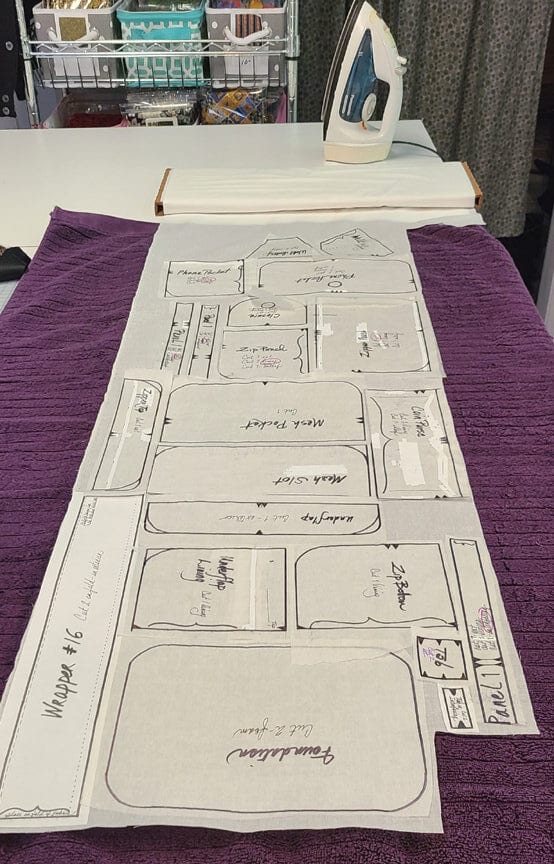
Here’s all my pieces lined up on the fusible side of the interfacing on top of a towel (instead of my ironing board). All I need do now is carefully fuse the center area of each piece with my iron.
After doing that, I carefully flip this whole area face down onto the towel and give the whole unfusible side of the interfacing area a good, full pressing. (DO give your pattern pieces a quick check to make sure they’ve stayed in place and haven’t shifted out of place.)
And just so you know, the interfacing I use for this procedure is Bosal Fashion Fuse, which is a cotton woven interfacing. It’s by no means the only interfacing you could use.
I DO however recommend using a cotton woven interfacing as opposed to other “paper-type” interfacings because in so doing your pattern pieces will maintain flexibilty, fluidity and be MUCH more resistant to tearing, shredding and permanent creasing, especially after folding them up and storing them after each usage.)
Next, I trim away any free & uncovered areas of fusible interfacing so that each piece can individually be pressed (interfaced-side-UP) on an ironing board.
If you’ll notice in the picture at left BELOW, even though the towel-pressed pieces have been fused effectively, they havent been fused perfectly as they would have been on a firmer surface, like an ironing board!
(Notice the little rumples in the interfacing in the photo below at left?)

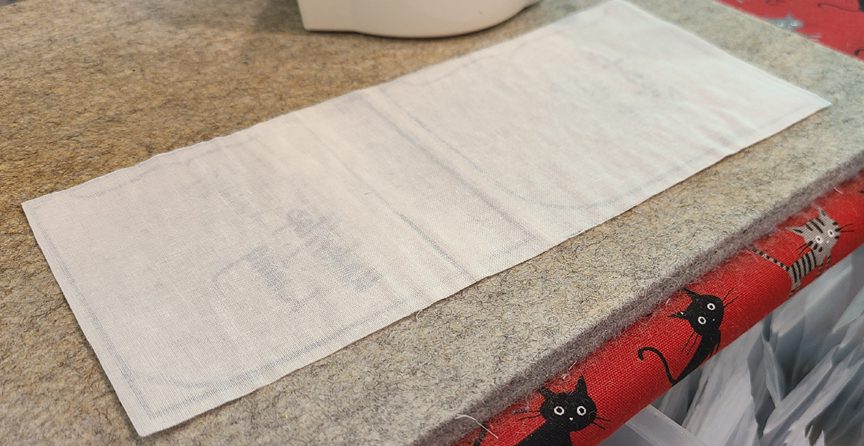
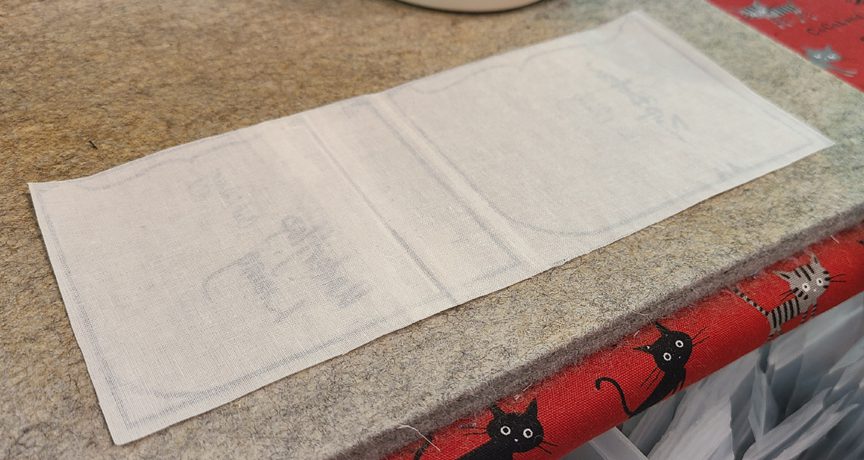
On the other hand though, in the photo at right (above), see how smooth & un-rumpled the interfaced area is after I press this piece one more time (face DOWN) on my ironing board? Once I give ALL my pieces this individual treatment, they will be fortified to last for many, MANY projects! I suggest you try it!
And now, it’s YOUR turn!
Have you ever tried applied interfacing to YOUR pattern pieces? If so, what kind of interfacing did you use and were you happy with the outcome & longevity for having done this? I’d also love to know if you have other suggestions you’d like to share with our group! The truth is… I love learning new thing from YOU!
And remember, we love reading your comments and answering your questions too, so please feel free to leave either or both in the space provided below.
Check out the best sewing pins with me on Pinterest, join in on discussions or show off your work in our FaceBook Group, or get your daily sewing fix on our Facebook Business Page or get behind the scenes scoops on Instagram, and be the 1st to know about new patterns, discount codes and sample sales by signing up for our monthly newsletter.
17 Comments
Join Our Mailing List!
Click button below to get 15% off your 1st pattern!


I started doing this over 20 years ago. Needed to preserve the pattern for my husband’s favorite shirt. I sent the tip to Sew News Magazine & they published it.
I can’t believe I’ve never heard of this but I’m a firm believer now! And its so easy!
I use wax paper or butcher paper on top to of the pieces to keep the adhesive from sticking to the iron. You can also use an applique product to keep from stickin.
I do tape the originals to the window and trace (FOR MY OWN USE) the patterns on 24# paper. The 24#paper is thicker and last a good while. I still have most of the original patterns uncut.
I love this new idea though. I think I’ll iron fusible side up and a silicone sheet on top of the pattern (interfacing will not stick to it). I often lay out the cut fabic on a full sized interfacing, fusible side up and iron thru a thin silicone sheet then cut the interfacing to the fabric.
I’ve also used silicone baking sheets on top of my ironing area when using fusible.
Love everything SKD.
Fascinating ideas! Thanks Don! 🙂
Google, PTFE Non-Stick Sheet for Heat Transfer Application
I definitely will! 🙂
All of my pattern pieces are still intact. The paper type is difficult to pin to fabric so I started to copy all of the pattern pieces onto freezer paper. This is quite time consuming but just this one time. The advantage is that I don’t have to pin to fabric I just iron the pattern pieces to the fabric without having to use pins. I can mark my fabric with a special pen that disappears with iron. and then pull the freezer paper right off. The freezer paper can be used over and over again.
WOW! I’ve never tried that either. I LOVE this idea!
🙂
I hate having to pin pattern pieces to fabric, so I copy to and cut my pieces from interfacing, then use a spritz of temporary spray adhesive to hold them in place on the fabric. It works well for the surgical cap pattern I use as I can just pull it up and move it. The adhesive lasts for all 20 times I cut them out per batch.
AMAzing! Ive never heard of this! 🙂
I’ve used freezer paper from way back when too. (this might be a 2nd comment as I lost the first one)
Do you have to copy the pattern pieces to the freezer paper every time? Just interested. 🙂
No I only copy once to freezer. I save all the pattern pieces. They pull off of the fabric easily and I can iron the freezer paper pattern pieces many times.
Rosemarie Nettle
To keep my iron gunk free, I found a nonstick pressing cloth (it is a heat resistant plastic/Teflon) works really well.
Also, if you get interfacing or other adhesives on your sole plate, spritz some water on a Magic Eraser (or similar) and rub your iron on it. It doesn’t scratch the surface. This tip is one I learned from Carmen Geddes of Ten Sisters Handicraft in a class workshop.
Wonderful idea! Love it! 🙂
I have also found that dryer sheets are very effective for removing fusible and other messy things from the bottom of your iron.