So…
you’ve probably heard the saying that “the devil is in the details”, right? Well, when it comes to handbag-making, I think the it’s the details that actually make or break the bag! And today I’m going to show you an easy-schmeasy way to add some beautiful detailing to any bag because I’m going to show you…
How to cover your strap!
You can choose from the outset whether you want to cover your strap in just one fabric or you can opt for two coordinating fabrics. The obvious advantage of using only one fabric is two-fold… its faster and easier! However, using two coordinating fabrics will yield a more polished look. The decision is yours but either is a definite improvement over an uncovered strap!
For today, I’m going to start you out easy, with the tutorial for the one fabric strap covering! So let’s get started!
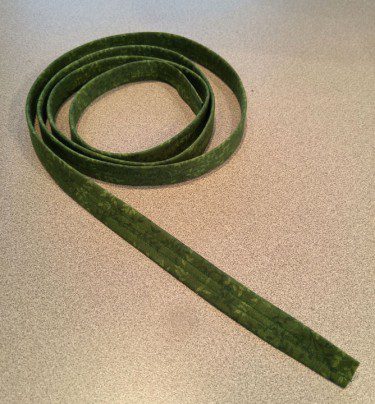
Here’s what you’ll need– strap webbing (choose either cotton or lightweight nylon) and fabric, that’s all. For the example I’ll be showing you today, I’ll be using 5/8″ wide lightweight nylon webbing for a 55″ long bag strap. So let’s cut our fabric!
1. Determine Your Fabric Length— Since my strap is 55″ long and since the fabric I’m using is only 44″ wide, I’m going to cut two strips that are 27.5″ long, PLUS since I want my fabric to be 2″ longer than my strap at each end, AND since my two strips will need to be attached to one another with a 1/4″ seam, the total length of my two strips should be 27.5″ + 2″ + 0.25″, or 29.75″ each. Now, how wide should my strips be?
2. Determine Your Fabric Width— My general rule of thumb when using cotton or lightweight nylon webbing is to multiply the width of the webbing by 3 and then add another 1/8″. So in this case, since my webbing is 5/8″ wide that would mean (5/8″ X 3) + 1/8= 2″ wide.
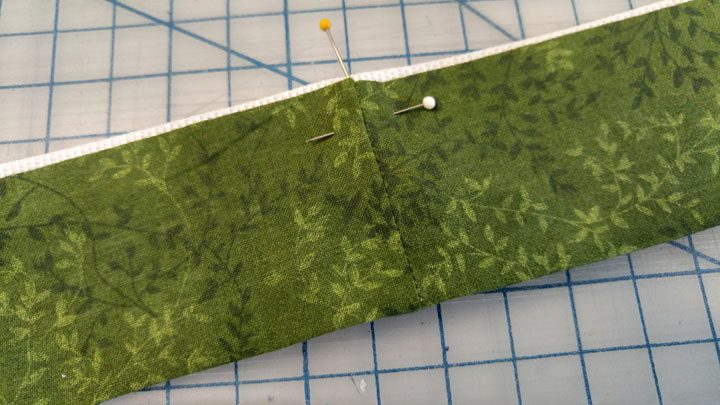
3. Stitch the two fabric strips together along one set of short edges (right sides together). Press seam open and flat. Your fabric strip should now be 59″ long X 2″ wide.

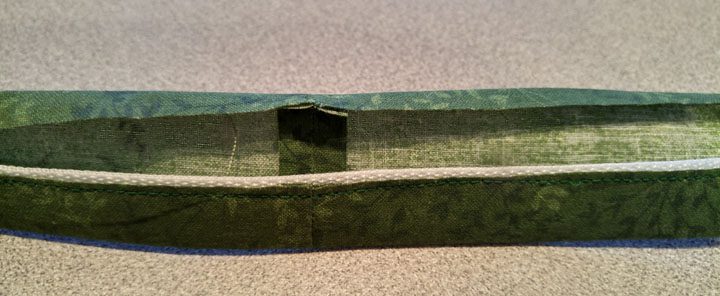
4. Mark the middle of your webbing with a pin, then place your fabric WRONG side down onto the webbing matching the pressed seam (from step 3) with the pin. Now continue pinning fabric to webbing so that the raw edge of your fabric is ~1/8″ from the webbing edge. Stitch close to fabric edge down the entire length of strap.
5. Press fabric around strap edge to underside of strap. Now press free fabric edge under 1/4″ (wrong side together). If you’re using nylon webbing, take care to NOT touch your hot iron to the nylon webbing itself.
6. Press pressed fabric edge over and up onto strap, concealing the raw edge that was stitched in step 4.
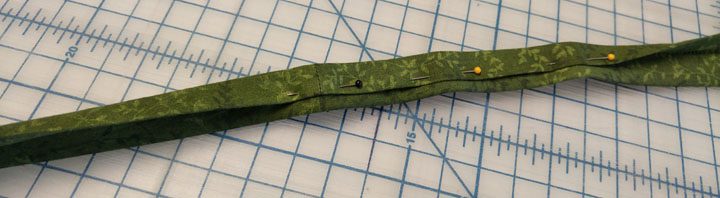
7. Continue pinning pressed fabric edge in place down entire length of strap. It should be ~1/4″ from opposite side of Strap.
8. Now stitch 1/4″ from BOTH finished side edges of strap. The folded edge of fabric (from step 7) should be caught in one of these stitch lines.

So there you have it!
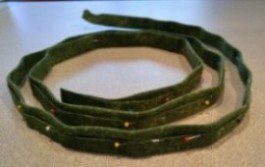
Your strap is completely enclosed and covered in fabric. Now all you need do is add your hardware and attach it to your bag.
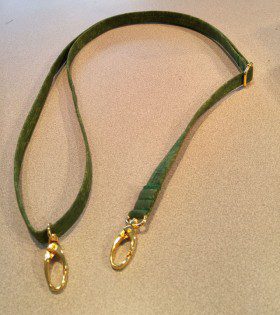
Our recommendation however is that you first add a slide buckle to make your strap adjustable. For more information about that, just click HERE to see how easy it is!
*********************************************************
I hope you find this post helpful for you and do stay tuned for the next post in this series when we’ll show you how to cover your strap with two coordinating fabrics. And remember, we love reading your comments and answering your questions too, so please feel free to leave them in the space provided below.
*********************************************************
Check out the best sewing pins with me on Pinterest, join our Facebook discussions, get your daily sewing fix and behind the scenes scoops on Instagram, and be the 1st to know about new patterns, discount codes and sample sales by signing up for our monthly newsletter.
Join Our Mailing List!
Click button below to get 15% off your 1st pattern!


