So…
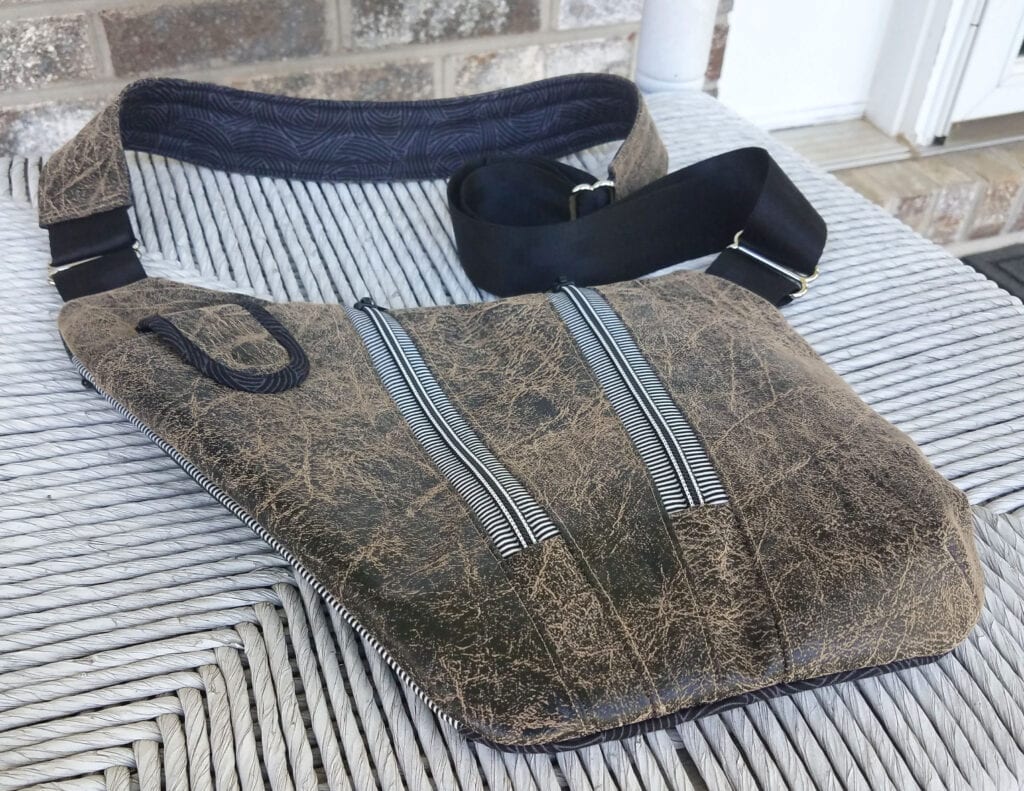
I decided right at the outset of the design process for the Side Slinger that this was the perfect time for me to try my hand (for the very 1st time) at faux leathers mainly because I feel so strongly that this particular design lends itself to men as equally as it does to women. So I chose 3 different faux leathers (two of which I’ve shown you and one I haven’t) and as it turns out, it’s a really good thing I tried both of them prior to writing this post, because my experience couldn’t have been more different between two of them!
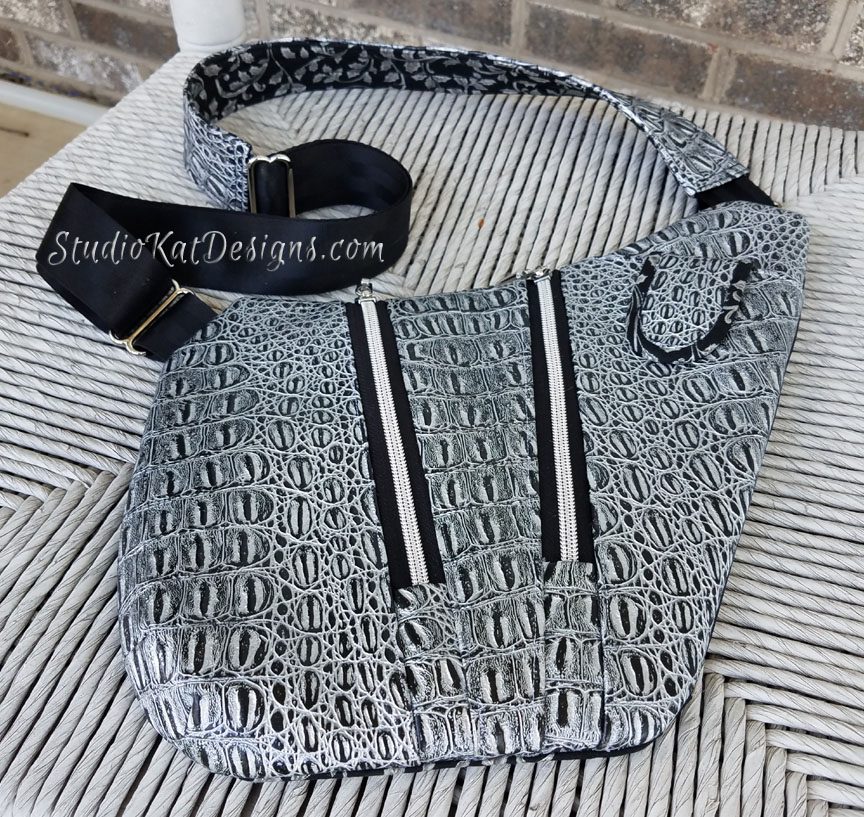
The only reason I even gave faux leather another try was that I was determined to make up a bag that would legitimately look like a bag that a guy would carry! And let’s face it, as much as I like the bag pictured above (and I do), no self-respecting guy would be caught dead carrying it, right?
Moral of the Story? I sure am glad I tried BOTH of these faux leathers! Because if I hadn’t, the tips n’tricks I would be giving you would be totally worthless. Truth is, I had absolutely no idea there could be THIS much variation in vinyl!
So with that lead-in….
Please watch this video… and then
Here’s some tips n’tricks for working with faux leathers!
- The single most important tip I can give you is to …. Choose Your Faux Leather WISELY! Obviously all faux leathers are not created equal. If at all possible, buy your product in a store where you can touch and test it a bit. For one thing, fold your faux leather RST and see how it behaves. Do the surfaces moves easily against each other? Or do they kind “stick” to each other? Because believe me, you want the kind that doesn’t stick to itself!
- Plan Your Project Wisely! Depending on the faux leather you have chosen, you can now map out your strategy for your new bag. For example, you don’t have to use faux leather for the ENTIRE bag exterior. I chose to only use faux leather for the front exterior of both of the Side Slingers I made and I was sure glad of this for the gator skin bag, but on the other hand, I actually could’ve used the weathered look for the front AND the back!
- The issues involved with pressing cork fabric are even WAY MORE pronounced with faux leather! As a matter of fact, you really can’t press faux leather at all with an iron. You can finger press it, but that’s about it. But on the other hand, tiny pin holes do seem to self-heal which means for example that you can pin it in place in order to topstitch it without a problem, among other things.
- You’re going to need a teflon presser foot but you may also need a teflon zipper foot in order to save your sanity and get good results. I got away without the teflon zipper foot when I was sewing with cork, but my stainless steel zipper foot was STUCK like glue to that gator skin faux leather.
And now…. it’s YOUR turn!
So… do YOU have any experience using faux leather? And if so, would you like to share any tips of your own? And remember, we love reading your comments and answering your questions too, so please feel free to leave either or both in the space provided below.
Check out the best sewing pins with me on Pinterest, join our Facebook discussions, get your daily sewing fix on our Facebook Business Page or get behind the scenes scoops on Instagram, and be the 1st to know about new patterns, discount codes and sample sales by signing up for our monthly newsletter.
2 Comments
Join Our Mailing List!
Click button below to get 15% off your 1st pattern!


How did it work to use a 1/4” seam allowance with a thicker material—especially if you need to do some top-stitching? When I work with a thicker material, I like to have at least 3/8” seam allowance to work with if I’m going to do any top-stitching—maybe it’s just better to stay away from the thicker materials and stick with thinner, more flexible options?
Something that may be helpful—make sure your material is warm. Vinyls tend to be more pliable if they are at least room temperature. Sometimes I warm my material with a heat gun (carefully!). If I ever have time, I’d like to make this and the Sling Along in Leather—I think that would look so awesome!
I had no problem with the 1/4″ seams. The only true problem I had was turning things right sides OUT and it was a serious problem with the “sticky” type of faux leather