So… It’s that time again! We’re pondering a new design… when everything is still on the drawing board, and all options are still possible! And after much debate amongst ourselves, we looked at the patterns that are performing the best for us right now and most all of them are either sling bag patterns or they’re backpack patterns. With this in mind, we decided to go with a shorter, yet roomier sling bag pattern with the versatility that it can actually be carried as a shoulder bag, and ALSO as a backpack (without a redesign)! Sound pretty much up our alley? Yep, I think so too?
So let me show you what I have in mind now!
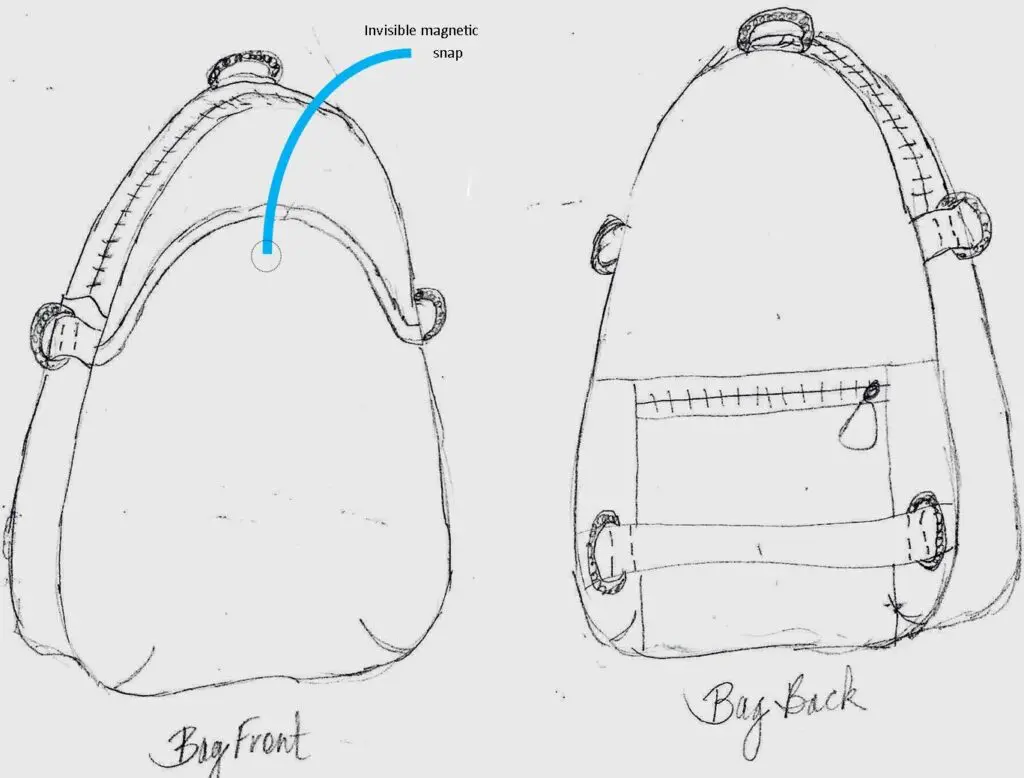
Above left, I still like having a roomy Pouch out front, the perfect place to store a smart phone… secure, yet easy to hear. I’m planning one main storage area, with a zippered entry.
Above right, I’m really happy with the design for this Bag Back. I’m using webbing for attaching the D-rings in an unconventional way and I like this look. It also provides for a unique way of adding contrast. And here’s the deal… by simply rearranging the straps, this bag can be carried as a shoulder bag, and also, as a one-armed sling bag! AND here’s the best part, one only has to make a 2nd strap to carry this bag as a backpack!
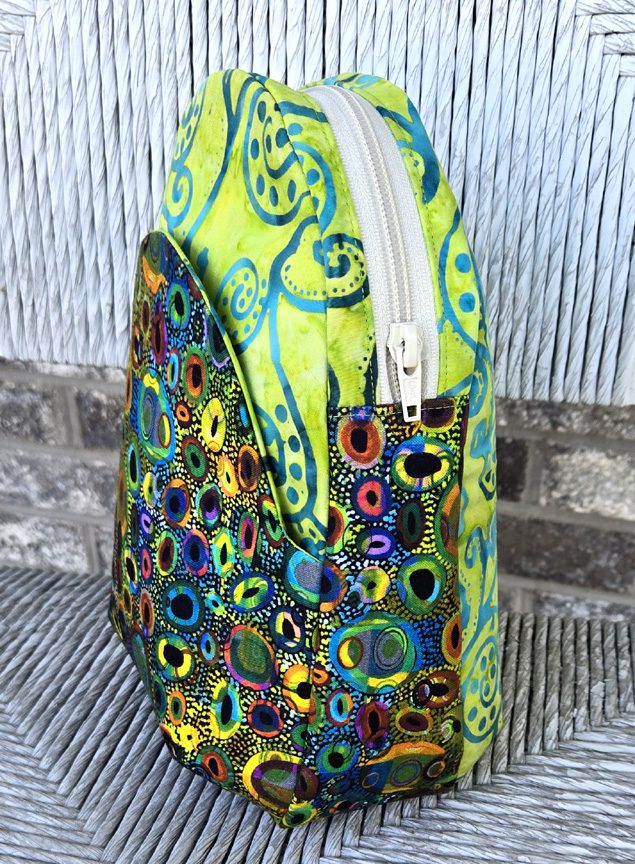
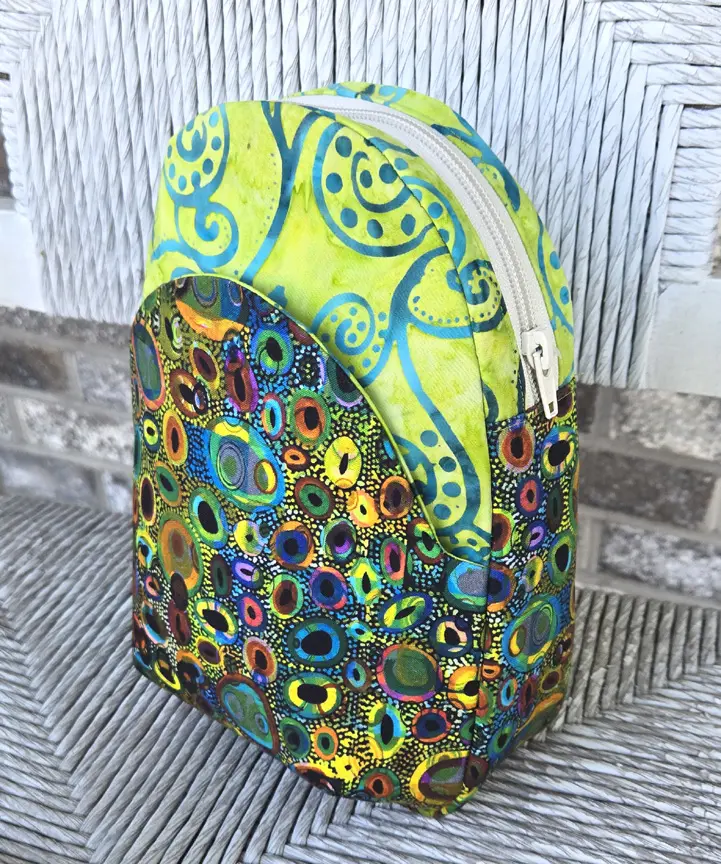
So without further delay, here’s the first prototype of the new design. Please remember… this is a PROTOTYPE… I don’t use good fabric, there’s no lining, there’s no hardware, there’s no strap, there’s no interior features just yet… and I used a junk zipper. The whole purpose of a prototype is to evaluate the design and the viability of the pattern pieces.
So… what was the verdict?

1. I really like the overall silhouette. It’s pleasing and not too big or small.
2. But if you look at the red arrows, I think the Pouch corners should align with the side Panel corners.
3. By the same token, I think there’s too much contrasting fabric visible on the Bag Front. I would prefer for the top edge of the Pouch be about 1″ from the top peak of the Bag. (see the pink arrow)
4. the Bag Back should be in exterior fabric.
5. and finally, please stay tuned for the next post in this series when we’ll show you the first true, working sample, complete with a lining and a strap so it can actually be carried and evaluated for its functionality.
And now, it’s YOUR turn!
I’d really like to know what you think of this design thus far. Does this bag seem like one that you might enjoy carrying? And do you agree with my assessments about it so far? And if you have comments you’d like to share, suggestions you’d like to make, or questions you’d like to ask about this design in general or this sample in specific, please feel free to leave either or both in the space provided below.
Check out the best sewing pins with me on Pinterest, join in on discussions or show off your work in our FaceBook Group, or get your daily sewing fix on our Facebook Business Page or the behind the scenes scoops on Instagram! And don’t forget to check out our video tips & tricks on our You Tube Channel and be the 1st to know about new patterns, discount codes and sample sales by signing up for “Bag Making is Fun”, our bi-monthly newsletter.



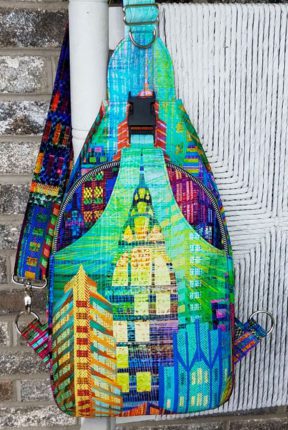

I love it! I would want a place for my water bottle.
Thanks for commenting Mary… but I’m not sure a water bottle will fit in this bag. In our next post in this series I’ll include a picture or two with a live model (me,,, haha) so you can see the relative size of this bag. 🙂
I would love some kind of divided pocket under the front flap so that my phone would always be on right (or left) side. Would appreciate a clasp for keys/key fob as well.
Hi Jane- thats a good suggestion, but so see my reply to Mary above, in that dividing that front pouch area would likely make neither area too accessible for you. 🙂 I’m deliberately going with a smaller size this time as there are SO many full sized backpack patterns on the market already and I get many calls for a smaller size. 🙂
Love the idea! It should be fun to make.
It’s fun to make AND fun to wear! 🙂
If you want the side panel to match the back pouch I would rather have the side panel come down to align with the pouch. That way you have a bigger opening to slide in a raincoat our a laptop
Thanks for commenting Lila. I do think a ripstop-nylon type raincoat could fit in the pouch area area, because it would be nice and thin when folded (or inside the bag for that matter, but a laptop wouldnt come close to fitting. You could definitely fit a Kindle or many of the various iPad style computers in there however. 🙂
Good bones and planned tweeting is good. Several of the suggestions are good ideas. Can’t wait to see the finished product!!
I hope you’ll be pleased as we start to roll this out. Next up— the Gorilla sample! 🙂
What are the approximate measurements? Will there be credit card holders on the interior? So far I like this design.
Thanks for commenting Leslie. the measurements are not finalized yet but should be soon. Right now they are 8″W X 9.5″T X 2.5″, but that could change a bit at this point. Right now I’m not envisioning credit card holders in this bag but in addition to the generous front Pouch area, there will also be an outside AND an inside zippered pocket. 🙂 Stay tuned for our next post next week?
I would love to see another small outside zippered pocket on the front to stash money or ID, etc.
I also would love the inside to have dividers or pockets and definitely a key ring to clip on my car keys because they always end up on the bottom of the bag.
Do you have approximate fabric requirements yet? The reason I’m asking is that I will be in Lancaster fabric shopping in a couple of weeks and would love to be shopping for this new bag 🙂
Hi Charlene and thanks for commenting. How about a zippered pocket on the BACK of the bag, along with the Pouch pocket in the front? I hate to break up the look of the front since its so conducive as is to fun fabric combos and focal prints? 🙂
That would be great!
One of the features that I especially like is the deep, elegant curve on both sides of the front pouch. You would lose that depth by stopping at the side corners. I agree that the two should match, so how about raising the whole pouch enough to meet the side corners. Or if that is too high, maybe the side corners could also be lowered slightly. By raising the pouch, you would have less background fabric showing. Just a thought! The design is really nice. I like the way you are putting the hardware on with the tapes. That’s a fun detail!
Those are good thoughts Beth and I’m experimenting with these very thoughts as we speak. Can’t wait to show you in our next post… hopefully next week! 🙂
It feels like an iteration of the sling-a-long thar is its own thing that may be a good fit here in my household. May I suggest a zippered pocket on the INSIDE of the front flap-hidden but more accessible for those small things that are always at the bottom of the bag. It sounds like the main compartment is a good size. I hope it is deep enough for a dinA5 notebook and an iPad. This looks like something I could carry as an alternative to both the sling-a-long and the Outbreaker in the winter. I love my sling-a-longs, but my A5 notebook is exposed and can get wet if it rains. It fits just so in my Outbreaker, but then the iPad doesn’t fit too. I like the idea of the sides being deeper rather than the face of the flap being pulled up as much.
Thanks for commenting Jodie. I know iPads come in many sizes, so its possible yours may fit in here, but a large one probably wont. But do stay tuned as we’ll be posting about the “Gorilla sample” we made next week! 🙂
I really like this! Yes, I agree with you on the alignment.
Thanks Dolores! I can’t wait to show you more! 🙂
I like the idea of the raised corners. Sounds like a fun bag.